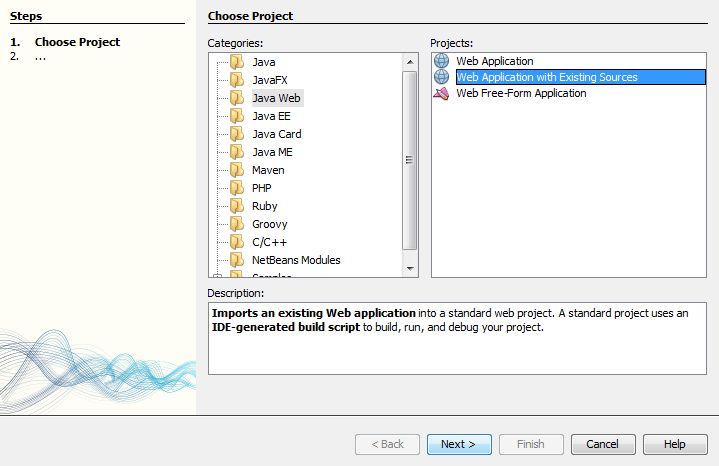
Create a new "Java Web" project:
- Choose File > New Project… to start the project configuration.
- In the "Categories" panel, select "Java Web"
- In the "Projects" panel, select "Web Application with Existing Sources"
- Hit "Next >"
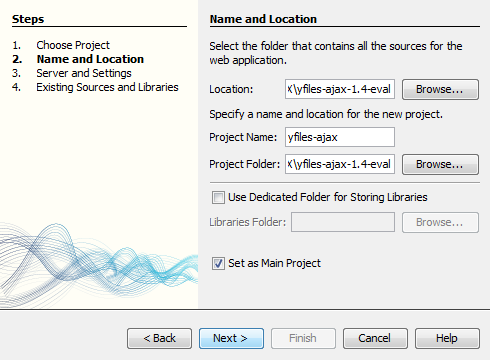
Select the name and location:
- As "Location", select the root folder of your yFiles AJAX distribution.
- As "Project Name", enter "yFiles AJAX"
- Leave the "Project Folder" as is, such that it is the same folder as in the "Location" field.
- Hit "Next >"
Confirm the build file path:
- If there is a dialog that asks about the name of the auto-created Ant build file, just confirm the suggested name by clicking "Ok".

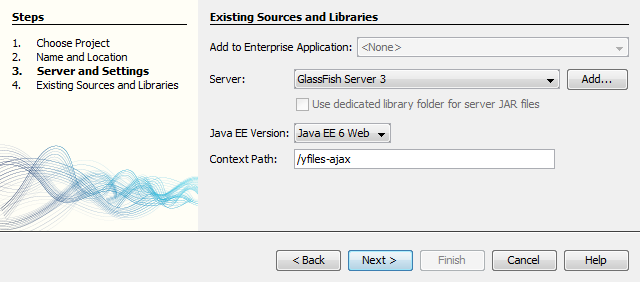
Configure the server:
- Configure the servlet container that should be used to run the web application. In this example, we are using the Glassfish server that is bundled with Netbeans. You may of course configure your preferred server here, e.g. a local Tomcat installation.
- Hit "Next >"
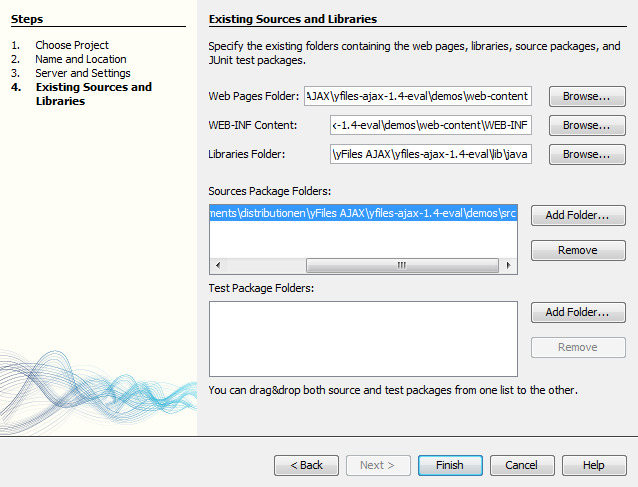
Configure the existing sources and libraries:
- As "Web Pages Folder", select the
demos/web-content/sub folder of the yFiles AJAX distribution. - As "WEB-INF Content", select the
demos/web-content/WEB-INF/sub folder of the yFiles AJAX distribution. - As "Libraries Folder", select the
lib/java/sub folder of the yFiles AJAX distribution. - In the "Source Package Folders" panel, add the
demos/srcsub folder if it is not chosen as default. - If your Servlet Container supports (at least) the Java Servlet Specification 3.0, you can also
add "
demos/src-jee6" as an additional Java source folder. - Hit "Finish". Note that although the configuration wizard finishes with this step, additional resource folders for the web application have to be configured in the next step.
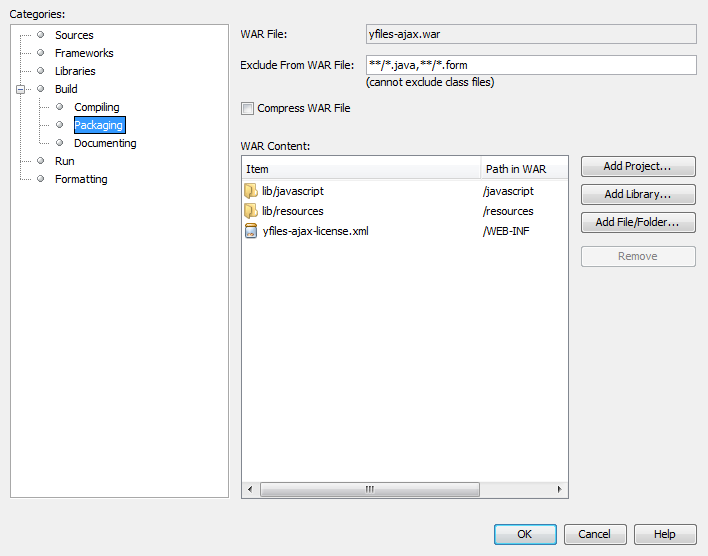
Configure additional web application resources:
- In the project properties, select Build > Packaging.
- Select "Add File/Folder" and add the
lib/javascriptsub directory of the yFiles AJAX distribution. Enter "javascript" in the corresponding "Path in WAR" field. - Select "Add File/Folder" and add the
lib/resourcessub directory of the yFiles AJAX distribution. Enter "resources" in the corresponding "Path in WAR" field. - Select "Add File/Folder" and add the yFiles AJAX license file (
yfiles-ajax-license.xml). Enter "WEB-INF" in the corresponding "Path in WAR" field.
As an alternative to the license file deployment, the xml license data can also be specified programmatically. Please see the corresponding section of the developer's guide for details.
(e.g. http://localhost:8080/yfiles-ajax/).